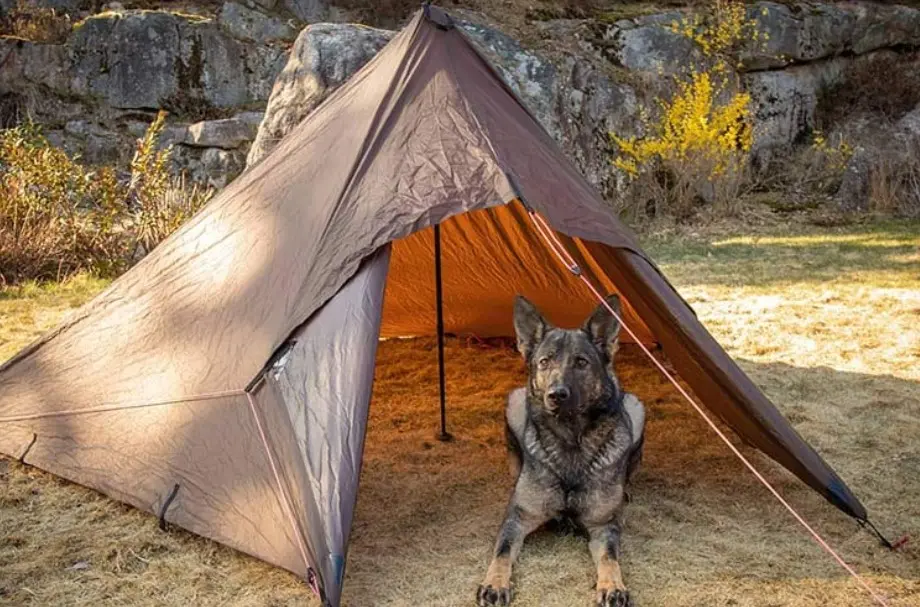
Pitching a tarp correctly is an essential bushcraft and self-supported camping skill. The same tarp offers very different protection depending on setup, orientation and fabric tension. Equipment alone does not make the difference: how you use it does.

In this article, RayonRando.com details 6 reliable, proven tarp setups, from simplest to most protective. The aim is to understand when to use each, its benefits, limitations and ideal conditions.

What are the basics of pitching a tarp?

Before discussing configurations, some fundamentals always apply.

A good location does half the work. Seek slightly raised ground away from hollows where water may collect, using terrain or vegetation for wind protection. Always orient your shelter with its back to the prevailing wind.

Tension is crucial. A poorly tensioned tarp flaps, lets water through and wears prematurely. Remember that tarps are rarely pitched high: the lower the pitch, the better the protection.

Pitch no. 1: A-frame

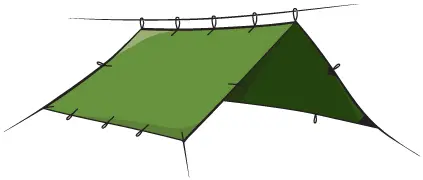
The A-frame is best known and often learned first. Stretch the tarp over a central ridgeline between two trees or poles, then anchor its sides to the ground.

It offers good rain protection and balanced interior space. Relatively simple, it works well with a 3×3 m tarp. However, it provides less side-wind protection if poorly oriented.

Use: this is the setup ideal for beginners and mild weather. Pitching is very quick between 2 trees.

Pitch no. 2: lean-to

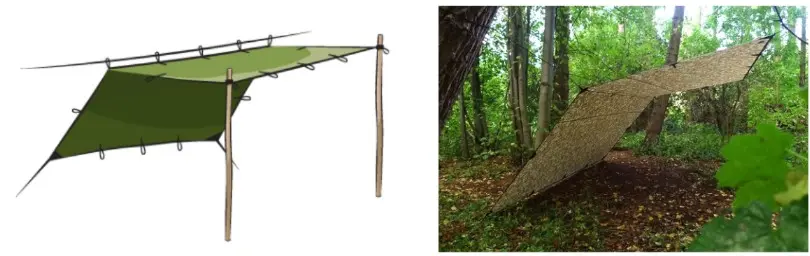
The lean-to is open, quick and minimalist. Raise one edge of the tarp and anchor the other to the ground, creating a sloping shelter against rain from one direction.

Comfortable in dry weather or light rain, it offers good visibility and excellent ventilation. However, it provides little protection against shifting winds or driving rain.

Use: favour this setup for short overnight camps and mild conditions. Also useful as daytime shelter for cooking and so on, before repositioning it for night-time if necessary.

Pitch no. 3: diamond fly

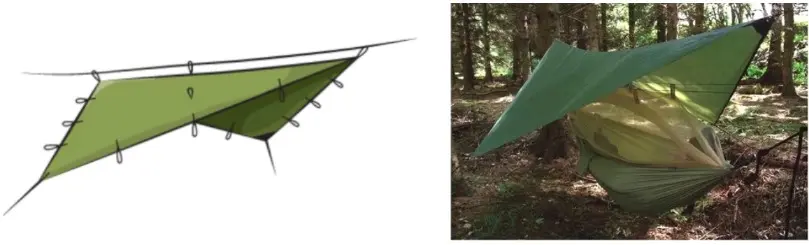
Use the tarp diagonally to maximise coverage from a square tarp, particularly over a hammock.

Quick to pitch, the diamond offers good lengthwise protection, but less side coverage and needs careful wind orientation.

Use: a useful configuration for hammocks and lightweight setups, providing good lengthwise coverage with reduced fabric area and total weight.

Pitch no. 4: Canadian-style shelter

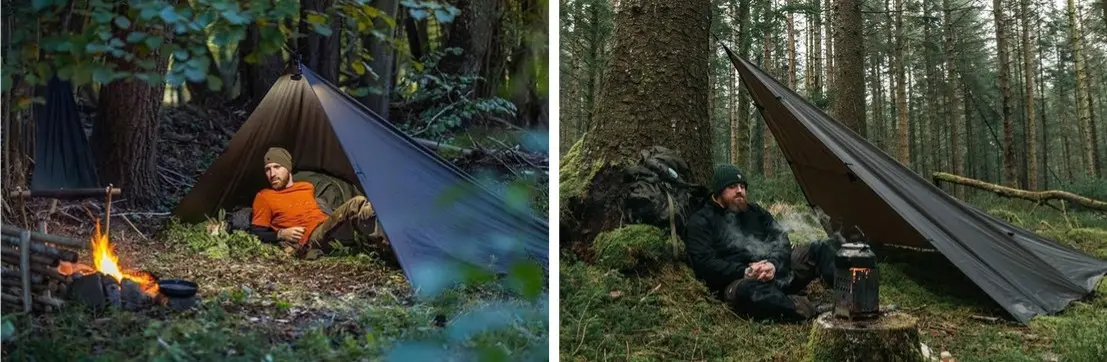
This pitch balances protection and ventilation. Tension the tarp asymmetrically, with an open front and lower rear.

It protects well against rain and prevailing wind while retaining a comfortable opening. Popular in woodland, it works particularly well with 3×3 m or 3×4 m tarps. It can be a light, quick-to-pitch tent alternative.

Interior space is more limited, making it better suited to lying down.

Use: at RayonRando, we consider this the most versatile setup, well suited to bushcraft and ultralight hiking. It can replace a tent on a fine-weather trek.

For even less weight, use the ultralight DD Hammocks Superlight 2.9 x 3 m tarp.

Pitch no. 5: low enclosed shelter, storm mode

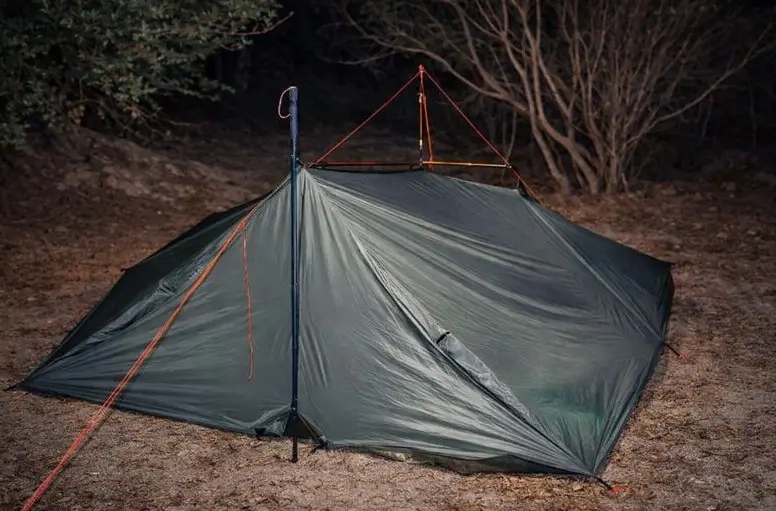
One of the most effective pitches in difficult conditions. Pitch very low with sides close to the ground to limit incoming air.

It provides excellent protection from wind, cold rain and heat loss. In exchange, interior space shrinks and ventilation needs monitoring because condensation risk increases.

Use: this option prioritises protection over comfort. For bad weather or cold conditions.

Pitch no. 6: enclosed shelter with improvised doors

With a sufficiently large tarp (3×4 m or 4×4 m), folding the ends creates “doors”, almost entirely enclosing the shelter.

The DD hammocks 3x4.5 or 4x4 tarps are good options for this configuration.

It offers maximum weather protection at the cost of more technical pitching and reduced ventilation. Particularly suitable for extended camps or winter conditions.

Use: an advanced pitch for somewhat experienced users. Very reassuring when done well, but it needs a fairly large, therefore heavier, tarp.

Which pitch for which conditions?

Setup choice depends primarily on 4 factors: weather, terrain, daytime or overnight use, and experience.
In calm weather, an open pitch suffices. As wind or rain intensifies, lower the tarp, close the shelter and prioritise protection over space.

The same tarp can be pitched differently every night. This adaptability makes it such a powerful bushcraft tool.

Common tarp pitching mistakes

Many problems stem from simple mistakes: pitching too high, poor tension, incorrect wind orientation or no slope for water run-off. Practising in good weather avoids these errors when they become critical.

Conclusion

Mastering a few tarp setups transforms camping. One tarp can adapt to almost every situation, provided you understand when and how to use each configuration.

At RayonRando.com, we see the tarp as a demanding, educational and extremely versatile tool rather than a “budget” shelter.

It offers less comfort than a double-wall tent, but with low weight and an affordable price.

To choose a tarp suited to your needs, also read our article Which tarp should you choose for bushcraft and survival?

FAQ – Pitching a tarp for bushcraft

What is the simplest tarp setup for beginners?

The A-frame setup is simplest for beginners. It needs little equipment, pitches quickly and teaches the essentials: fabric tension, wind orientation and water run-off. It offers decent rain protection and works perfectly with a 3×3 m tarp.

Which tarp setup offers the best rain protection?

The most effective rain setups are low, enclosed shelters and setups with improvised doors. Lowering the tarp and closing exposed sides limits splashing and wind ingress. These suit prolonged or driving rain particularly well.

Can you pitch a tarp without trees?

Yes, a tarp can be pitched without trees using trekking poles, stakes, rocks or natural terrain. Low pitches such as a lean-to or storm shelter suit this best. Simply pay attention to tension and accept a lower shelter height.

How long does pitching a tarp take?

With a little practice, a simple tarp setup takes under five minutes. More enclosed or technical pitches take longer, especially in wind or difficult terrain. Setup quality takes priority over speed.

Which tarp setup should you choose in wind?

In strong wind, favour a low, enclosed setup, back to the prevailing wind. Low enclosed shelters and well-positioned Canadian-style pitches offer the best resistance. The closer the tarp is to the ground and the better anchored, the better it handles gusts.

Should you always pitch a tarp very low?

No, tarp height should suit weather conditions. In calm weather, a higher pitch improves comfort and ventilation. In rain, wind or cold, lowering it is essential for maximum protection.

Can you alter a tarp setup during the night?

Yes, this is a major advantage. You can often readjust a setup without dismantling everything, lowering one side, adding an anchor point or closing an end. This adaptability lets you react quickly to changing weather.

What is the most versatile tarp setup?

The Canadian-style pitch is considered one of the most versatile. It offers good rain protection, decent ventilation and easy shelter access. It adapts to many situations and works well with a 3×3 m or 3×4 m tarp.

Product comparison
Compare
Rayon Rando advice