




1 – Recognising route types to anticipate potential difficulties
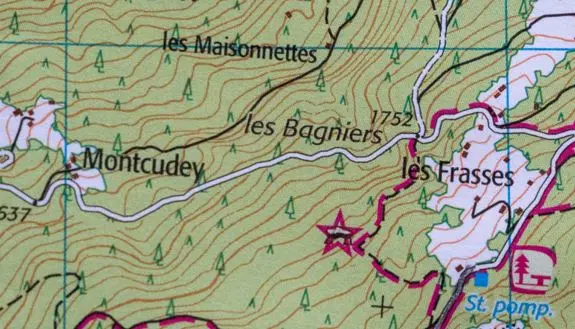
In this example, travelling from Maisonnettes to the dolmen near Frasses takes you along most types of route:
- Vehicle routes in white: 2 solid black boundary lines indicate a surfaced road; dotted boundaries indicate an unsurfaced vehicle track, sometimes difficult for vehicles with low ground clearance.
- Footpaths and tracks in black: a solid black line indicates a path normally visible on the ground because it is well used. With dots, take care: vegetation may obscure the path completely. Also, nothing indicates the path is waymarked between Maisonnettes and Montcudey.
- Waymarked routes in red. The line may be:
- Thick to indicate a GR (Grande Randonnée long-distance route) or GRP (Grande Randonnée de Pays regional long-distance route); a thinner line may indicate a PR (Petite Randonnée short walking route), for example.
- Solid for a main route, always following a path, track or road. Broken for an alternative route that may include off-path sections.
Note that paths may be waymarked without appearing in red on the map (a local council path, for example).
-> Do not confuse broken lines made of dots with dashed lines: these indicate difficult sections to avoid with people with walking difficulties or a fear of heights, for example.
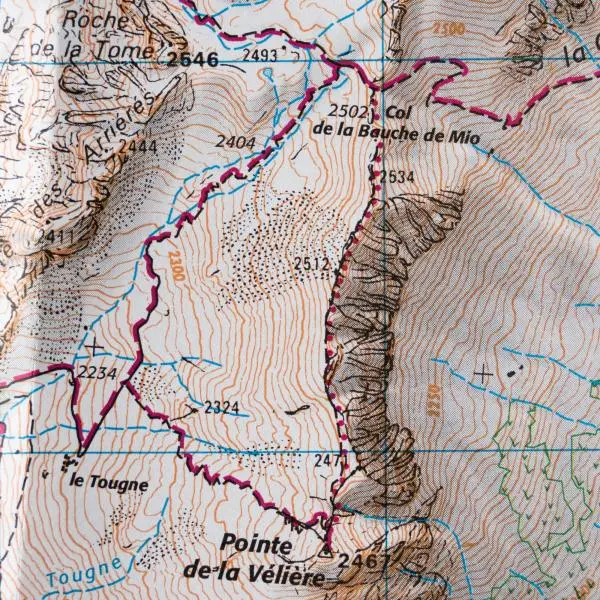
Identifying potentially unmarked, poorly defined paths helps you anticipate possible difficulties and longer walking times than on clear paths.
2 – Contour lines: anticipating difficulties and walking time
Here is how to read contour lines on a 1:25,000 map:
- 2 adjacent lines represent a 10 m difference in elevation.
- Every 50 m of elevation, a thicker line is used.
- The number printed on the line indicates its elevation.
- The orientation of these numbers also tells you which way the slope faces: the bottom of the number points downhill.
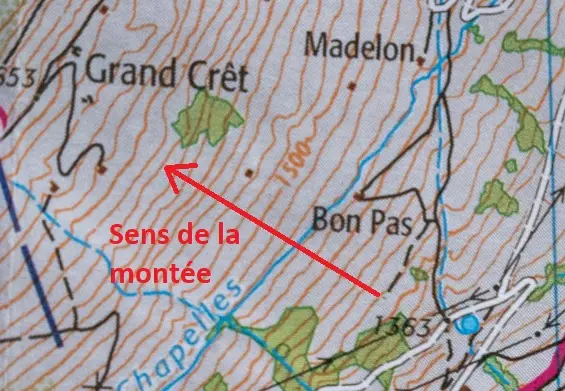
You can determine whether the slope will be steep or gentle, anticipating difficulty and walking time: widely spaced lines = gentle slopes; close lines = steep slopes, potentially difficult terrain if very tightly packed.
Contour lines also help you identify:
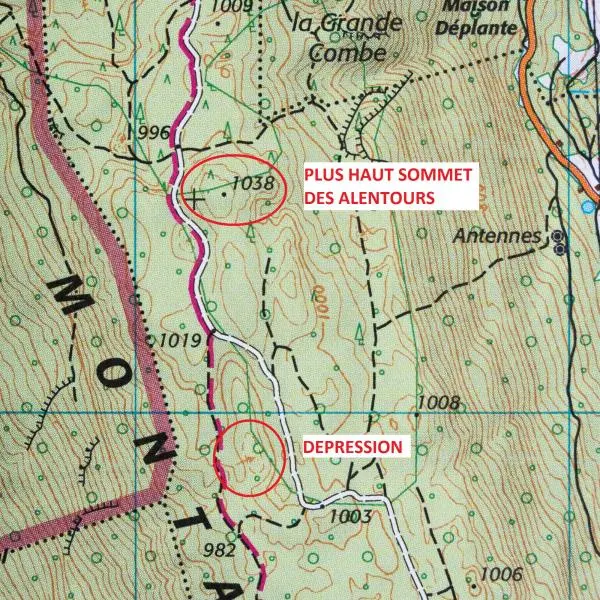
- A summit or depression. Any orange line forming a circle indicates a summit unless an arrow points into its centre, as below. In that case, it is a depression. A useful tip: if a summit has its elevation marked on your map, it is the highest summit nearby. This can help you locate yourself in an area with many small summits.
- A flat area that may be suitable for wild camping.
3 – Mountain huts and shelters: planning overnight stops and bad-weather options
These are represented by a “house” symbol, drawn differently depending on the type of building.
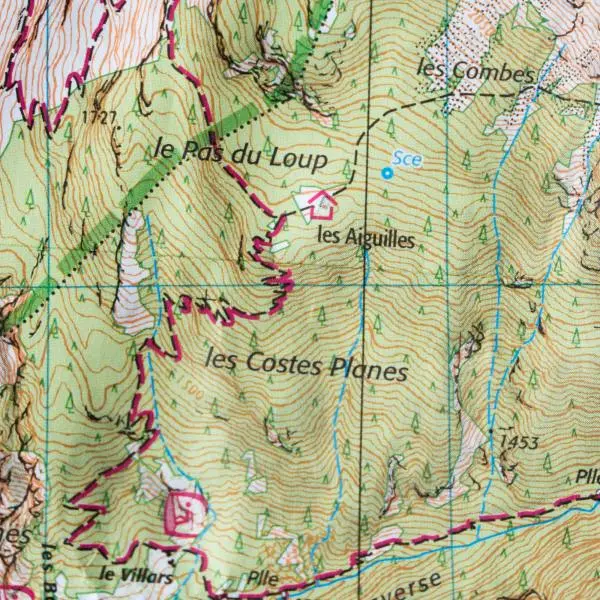
Our example shows a shelter, which should normally always be open, offering somewhere to shelter during a thunderstorm, for example. Staffed or unstaffed mountain huts may close out of season. In winter, check whether an open winter room is available.
4 – Vegetation
Vegetation is shown in green:
- Green symbols on a white background = low or very sparse vegetation.
- Green symbols on a green background = forest
You can locate yourself on the map by observing the outlines of vegetation areas and sometimes distinguishing conifers from broadleaved trees.
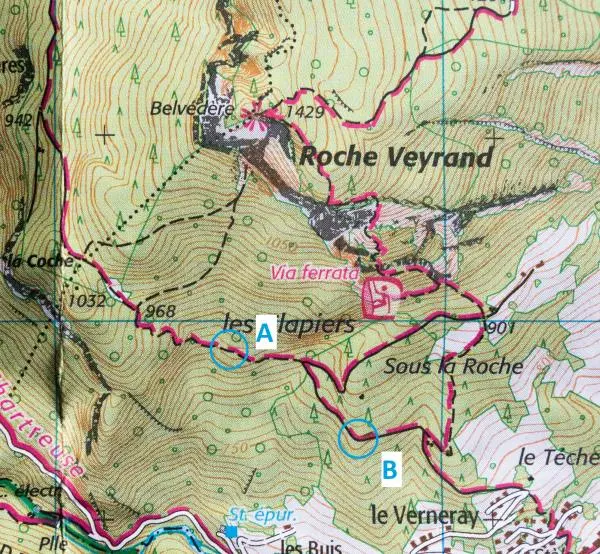
In this example, at point A you should see only broadleaved trees around you. At point B, however, there should be none.
5 – Watercourses and springs: useful for navigation, essential for refilling water
You still need to know what to expect:
- A solid blue line = water present all year except during severe drought
- A broken blue line = water present temporarily, depending on the time of year
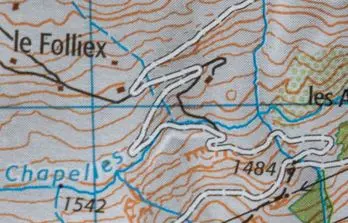
Generally, water is more likely to be present in May–June, fed by melting snow and glaciers and not yet dried up by heat. From July, “dotted” watercourses may run dry, and usually do by September.
Conditions vary from year to year with the weather, however: remember to check locally.
Reading the map and navigating on the ground
1 – The 1st principle is simple: compare what you see with what you read.
But first you must orient the map correctly:
- If you know exactly where you are, hold your map in your direction of travel, rather than with the labels the right way up.
This may feel counterintuitive at first, but it makes matching nearby features to those on the map easier. Turn your map regularly as you progress.
- If unsure, orient the map using your compass to find visual landmarks (summit, woodland edge, building). An altimeter can help locate your path on the map.
2 – The 2nd principle is that you should know where you are at all times, as precisely as possible.
Here are some tips to avoid getting lost:
- Make the effort to check your position regularly.
Glance at the map every 5 minutes to confirm your position. Waiting until unsure is already a little late, particularly in complex areas with unmarked paths, as between points A and B here (many woodland paths and junctions).
In complex areas, keep your finger on your position on the map.
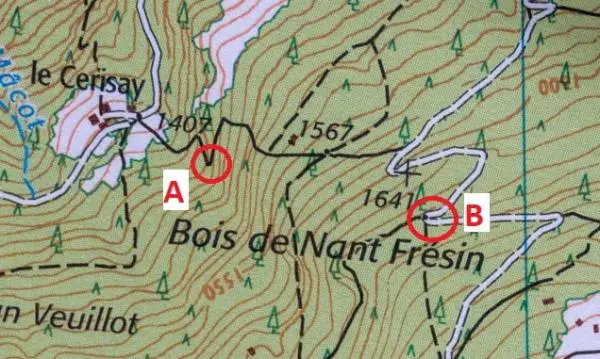
- If unsure, retrace your steps to a known location rather than becoming completely lost. Taking a “shortcut” when off route is tempting but risky.
A quick example using this extract:
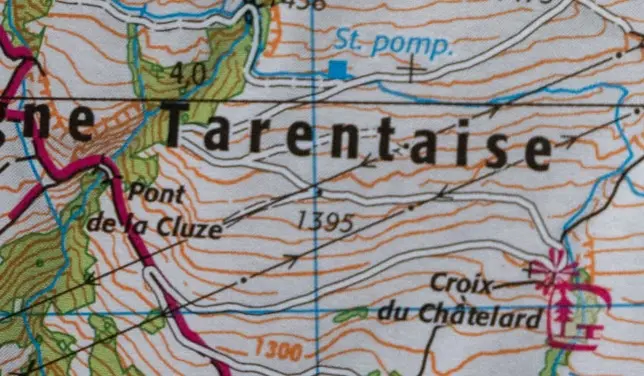
I am having a picnic at La Croix du Châtelard and want to continue towards Le Pont de la Cluze.
Here is what I can read on the map and will confirm as I progress on the ground:
- I will take a road, not a small path.
- The road will soon start descending.
- I will gradually approach high-voltage power lines (black lines with dots and arrows).
- My waymarked path resumes at a clear hairpin bend.
- This waymarked path heads towards woodland and a bridge.