
How to choose a multifunction Swiss Army knife

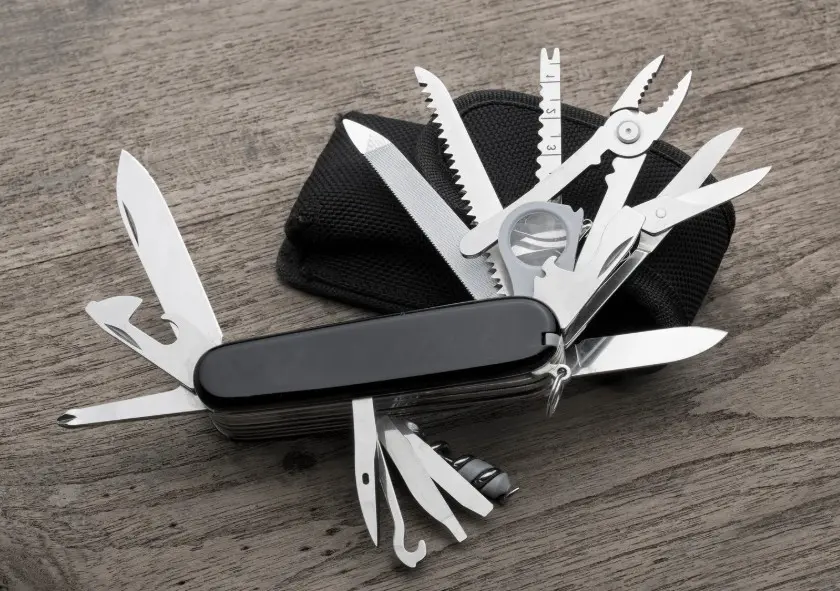
Some items of hiking equipment really make a difference. A Swiss Army knife is certainly one of them. Compact, versatile and reliable, it is useful for everything from preparing a meal to repairing equipment outdoors.

But with so many models available, one question often comes up: which Swiss Army knife should you choose for hiking? Between the number of functions, size and weight, it is easy to make the wrong choice. 

There are also official Swiss Army knives from Victorinox, which are particularly reliable, and copies that cannot match their build quality or tools.

Here is a clear guide to choosing well.

Why choose a multifunction Swiss Army knife for hiking?

A Swiss Army knife is more than a knife. It is a versatile tool designed to handle a variety of outdoor situations.

A truly versatile tool

On a hike, you can use it to:

  • Cut rope or webbing
  • Prepare a meal
  • Repair equipment
  • Open a tin or bottle
  • Cut dressings or clothing in the event of an injury

One tool covers a wide range of uses.

Saving space and weight

Instead of carrying several tools, a Swiss Army knife brings the essentials together in a compact package. This is a real advantage when every gram counts. It also keeps the accessory you need close to hand.

The reliability of Victorinox models

It is hard to discuss Swiss Army knives without mentioning Victorinox. Founded in Switzerland in the late XIX century, the brand has historically supplied the Swiss army. Its tools have become a worldwide benchmark for build quality, strength and, above all, lasting reliability.

In practice: whichever model you choose, you get a durable, highly reliable product designed to last for years. Victorinox is the only official manufacturer of Swiss Army knives. Copies cannot achieve such reliable, lasting assembly, and their tools are generally inferior too.

Key criteria for choosing a Swiss Army knife

Number of functions: the classic mistake

This is often the first criterion people consider… and the most common trap.

  • Too many functions → a heavy, bulky, impractical knife. We find heavily equipped knives less comfortable to hold and their tools more awkward to use.
  • Too few → you soon find yourself limited

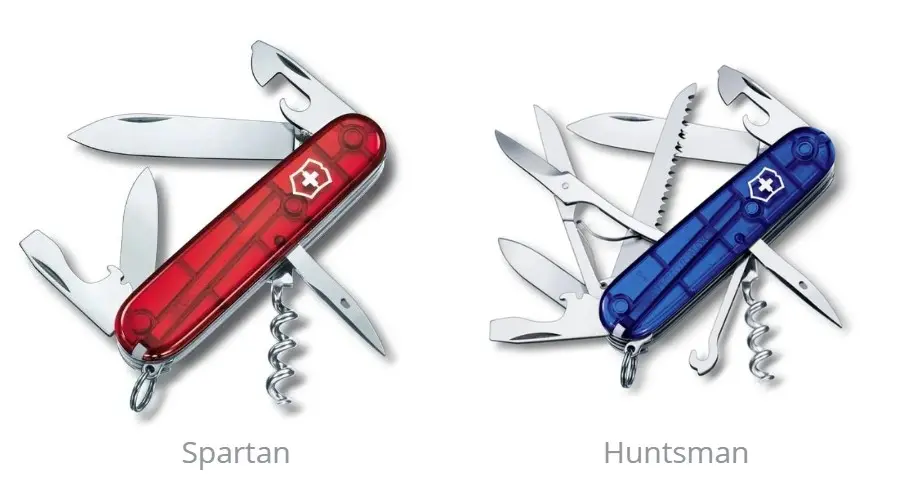
-> The aim: find the right balance. At RayonRando, we think 2 models suit most situations:

Size and weight

Swiss Army knives come in several sizes:

  • 58 mm: very compact, but limited. At RayonRando, we find the blade a little small for everyday tasks. 
  • 91 mm: the standard size and best compromise. Comfortable to hold, with a sufficiently large blade and tools.
  • 111 mm: sturdier but bulkier. Practical at home, but a little cumbersome when travelling.

-> For hiking, at RayonRando we generally recommend the 91 mm size, which offers a good balance between compactness and functionality.

Tools that are genuinely useful for hiking

You do not need 30 functions. Here are the ones that really matter; we find the first 3 particularly useful on multi-day trips:

  • Main blade
  • Wood saw: Victorinox saws cut exceptionally well. An essential complement to the blade.
  • Scissors: small, but these also cut very well. Useful for first aid and minor repairs to equipment and clothing.
  • Tin opener / bottle opener
  • Screwdriver
  • Corkscrew: not always useful, but its absence can cause quite a crisis…

-> Alongside the Spartan and Huntsman, here are 2 well-equipped models:

Handle type: Alox or classic

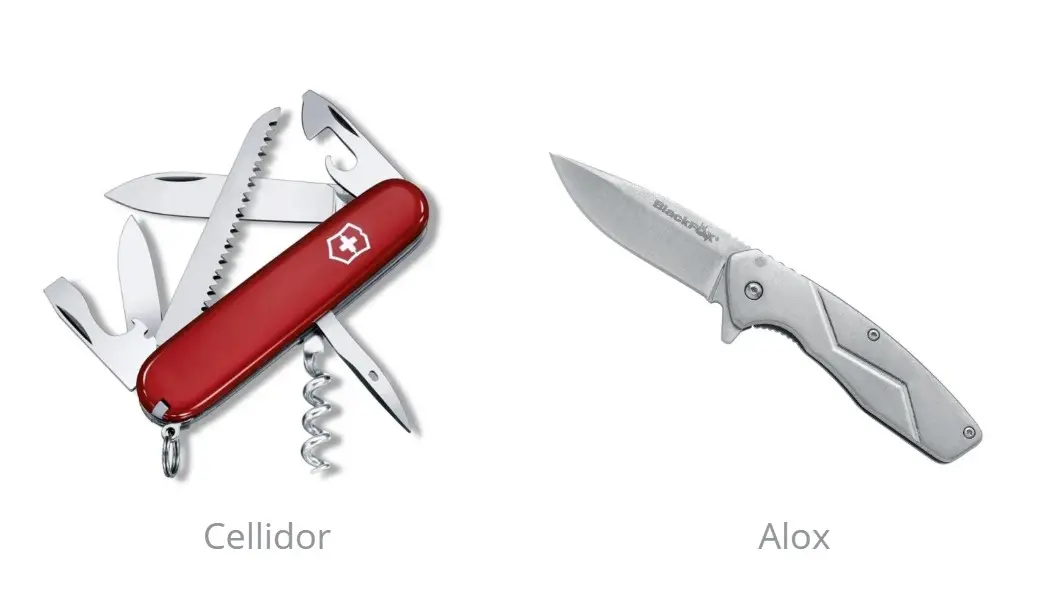
  • Cellidor (plastic): lightweight, ergonomic, good grip
  • Alox (aluminium): sturdier, slimmer, premium finish

-> For hiking, Cellidor is often the most comfortable option. The aluminium version is more of a treat for yourself or a gift.

Which Swiss Army knife suits your activities?

Here are our suggested Swiss Army knives for each type of use.

Occasional hiking

You want a simple, lightweight tool.

-> RayonRando recommendation: Victorinox Spartan

Regular hiking / wild camping

You need versatility without unnecessary extras.

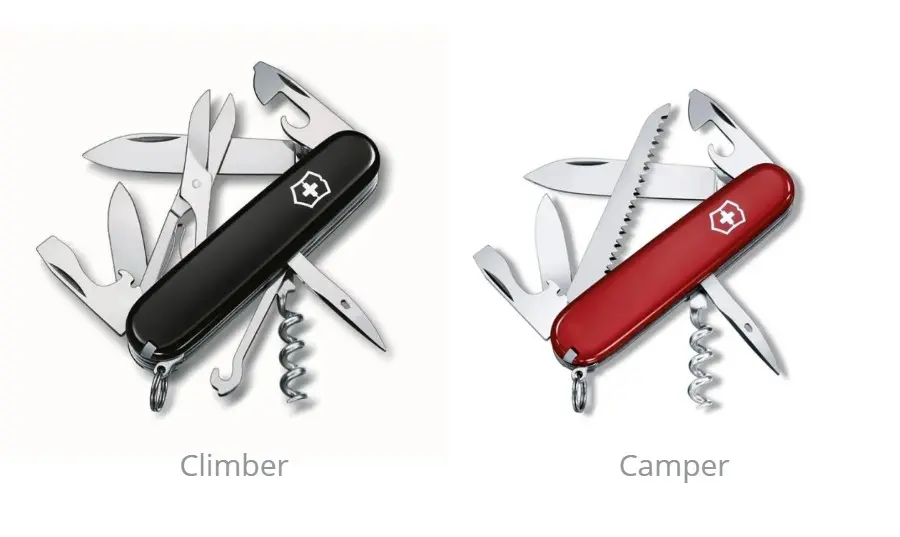
-> RayonRando recommendation: Victorinox Huntsman. It is the best compromise for most hikers. The Camper or Climber also suits you if you feel you can do without the saw or scissors, respectively.

Trekking or intensive use

Strength and versatility take priority.

Choose a model with:

  • A saw 
  • Scissors
  • Sturdy tools

-> The clear choice is the Huntsman.

Minimalist / ultralight approach

Aim: reduce weight as much as possible.

Prioritise:

  • Compact models
  • Essential functions only

-> In this case, the Spartan, Evowood, or even the Camper or Climber are good choices.

Mistakes to avoid when choosing your Swiss Army knife 

  • Choosing an overly complicated model
  • Focusing solely on the number of functions
  • Overlooking weight
  • Failing to match the knife to your actual use

-> The best knife is the one that suits you best, rather than the one with the most features.

Care and lifespan

A well-maintained Swiss Army knife can last for years. It is a simple, sturdy product that needs little special care. Maintenance is straightforward.

Do regularly:

  • Clean after use
  • Dry thoroughly

Do occasionally:

  • Sharpen the blade
  • Lubricate the mechanisms

Conclusion

Choosing a multifunction Swiss Army knife is straightforward if you start with your needs.

At RayonRando, we recommend simplicity over an exhaustive set of features

To recap:

  • For occasional use, the Spartan is sufficient.
  • For regular use, the Huntsman provides the essentials.

We do not recommend models with too many functions: their thickness can make them awkward to hold, and finding the right tool may be difficult. Longer models (111 mm) are better suited to garden / workshop use, while standard models (91 mm) are excellent for multi-day trips.

In most cases, the Victorinox Huntsman remains the best-balanced choice.

How to read an IGN map

Tired of following routes that someone else has planned?

Want to become more independent, adapt your routes or explore new terrain?

Knowing how to read an IGN map is an essential hiking skill. It helps you understand the terrain, anticipate difficulties and navigate effectively, even without GPS.

We explain how to read an IGN map, covering:

  • Understanding symbols and the map key.
  • Finding your position and navigating.

Navigation equipment

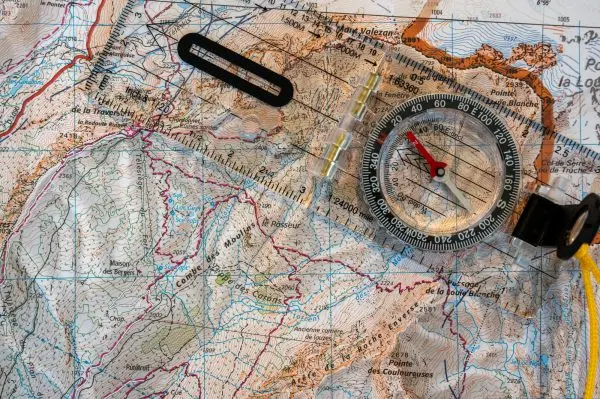
Compass and altimeter? They are not always essential, but are often useful for mountain navigation:

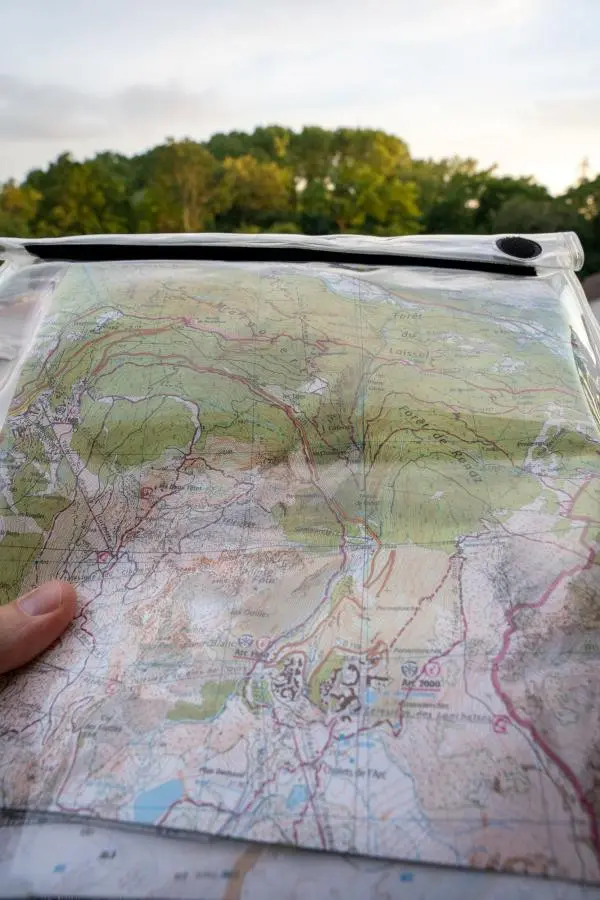
We offer a range of essential navigation equipment for using an IGN map when hiking: compact baseplate compasses with magnifiers, and various waterproof map cases (S, M and Big sizes) to protect paper maps and make them easy to consult. These tools help you find your position and complement your trekking equipment.

Which IGN map should you choose?

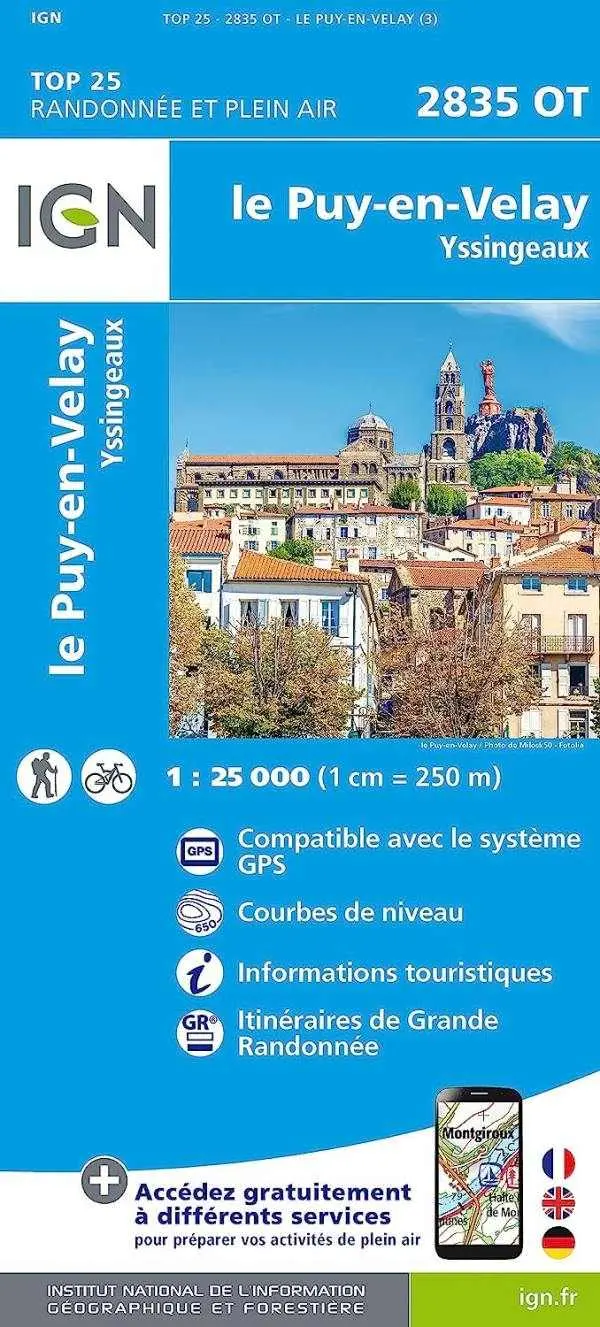
RayonRando recommends TOP25 topographic maps at 1:25,000 scale, where 1 cm represents 250 m. This is the smallest scale, making it the most precise, comprehensive and easy to read. IGN Série Bleue mapping provides the detailed geographical information essential for hiking.

Other maps (1:50,000 or more) are useful at home for planning a hike with an overview of the area.

The choice is often between a paper version, protected from the weather in a map case, and a laminated version. Paper suits an occasional trek in a mountain range; it wears at the folds but remains easy to handle. For repeated use, the transparent PVC Scout Map Case provides good protection: lightweight (71 g), waterproof and supplied with a carrying cord. The official IGN laminated version costs more but resists moisture and tearing well.

Getting to grips with the key: understanding IGN map symbols

The various symbols and map keys help you:

  • Identify your location visually.
  • Identify difficulties and hazards on particular sections.

1 – Recognising route types to anticipate potential difficulties
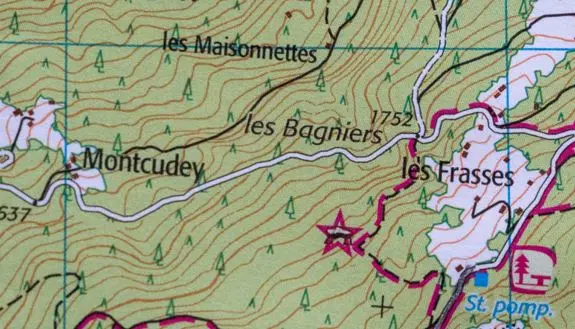
In this example, travelling from Maisonnettes to the dolmen near Frasses takes you along most types of route:

  • Vehicle routes in white: with 2 solid black boundary lines, this is a surfaced road; with dotted boundaries, it is an unsurfaced vehicle track, which may be difficult for vehicles with low ground clearance.
  • Footpaths and tracks in black: a solid black line indicates a path that should be clearly visible on the ground because it is used sufficiently often; with dots, take care: vegetation may cover the path until it disappears completely. Another point to bear in mind: nothing indicates that the path is waymarked between Les Maisonnettes and Montcudey.
  • Waymarked routes in red. The line may be:
  • Thick to indicate a GR (Grande Randonnée long-distance route) or GRP (Grande Randonnée de Pays regional long-distance route); a thinner line may indicate a PR (Petite Randonnée short walking route), for example.
  • Solid for a main route, always following a path, track or road. Broken for an alternative route that may include off-path sections.

Note that paths may be waymarked without appearing in red on the map (a local council path, for example).

-> Take care not to confuse broken lines made of dots with dashed lines: these indicate a difficult section that should be avoided by people with walking difficulties or a fear of heights, for example.
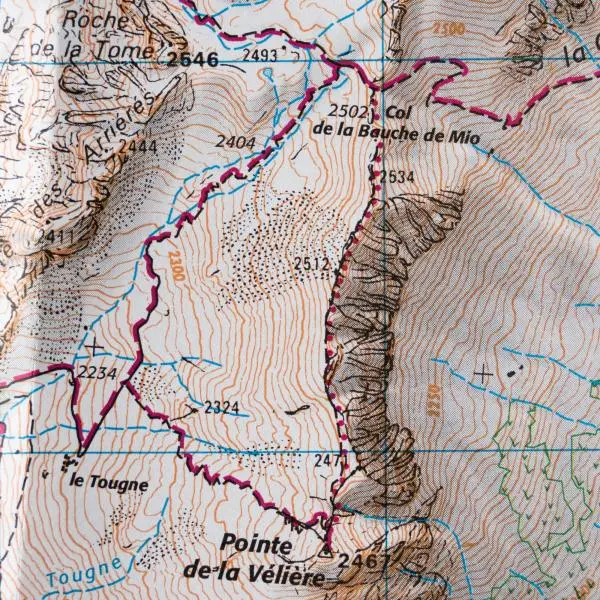
Identifying potentially unmarked, poorly defined paths helps you anticipate possible difficulties and longer walking times than on clear paths.


2 – Contour lines: anticipating difficulties and walking time

Here is how to read contour lines on a 1:25,000 map:

  • 2 adjacent lines represent a 10 m difference in elevation.
  • Every 50 m of elevation, a thicker line is used.
  • The number printed on the line indicates its elevation.
  • The orientation of these numbers also tells you which way the slope faces: the bottom of the number points downhill.
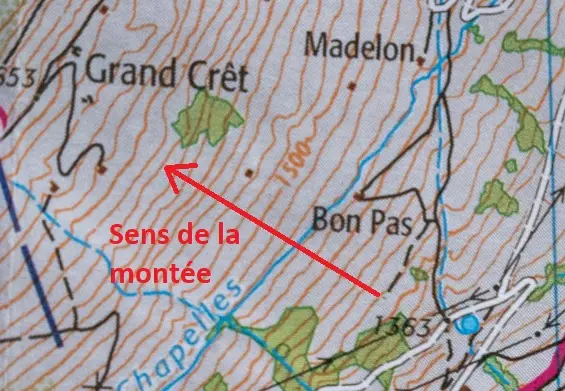
You can also determine whether the slope is likely to be steep or gentle, helping you anticipate difficulty and walking time: widely spaced lines = gentle slopes; closely spaced lines = steep slopes, or potentially difficult terrain if the lines are very close together.

Contour lines also help you identify:

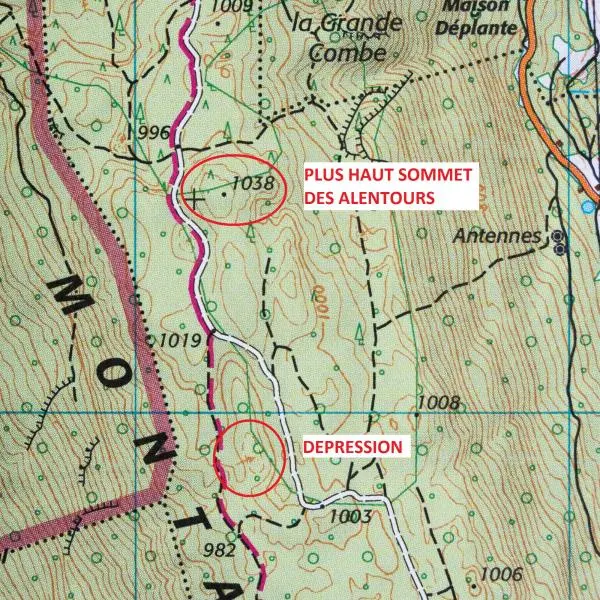
  • A summit or depression. Any orange line forming a circle indicates a summit unless an arrow points into its centre, as below. In that case, it is a depression. A useful tip: if a summit has its elevation marked on your map, it is the highest summit nearby. This can help you locate yourself in an area with many small summits.
  • A flat area that may be suitable for wild camping.
  

3 – Mountain huts and shelters: planning overnight stops and bad-weather options

These are represented by a “house” symbol, drawn differently depending on the type of building.
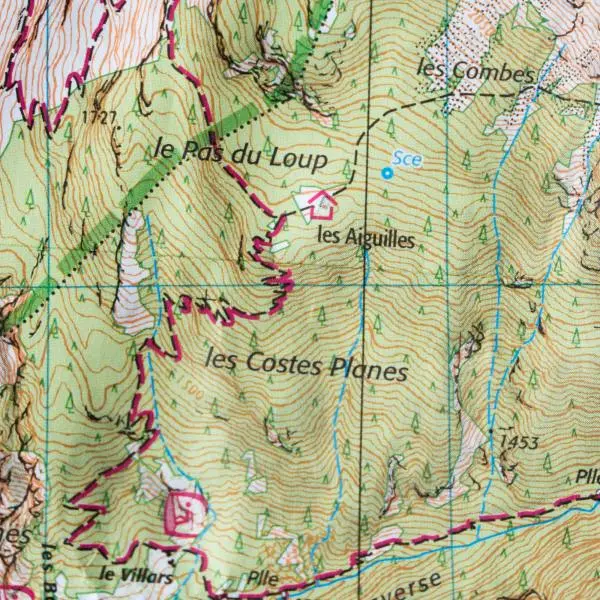
Our example shows a shelter, which should normally always be open, offering somewhere to shelter during a thunderstorm, for example. Staffed or unstaffed mountain huts may close out of season. In winter, check whether an open winter room is available.


4 – Vegetation

Vegetation is shown in green:

  • Green symbols on a white background = low or very sparse vegetation.
  • Green symbols on a green background = forest

You can locate yourself on the map by observing the outlines of vegetation areas and sometimes distinguishing conifers from broadleaved trees.
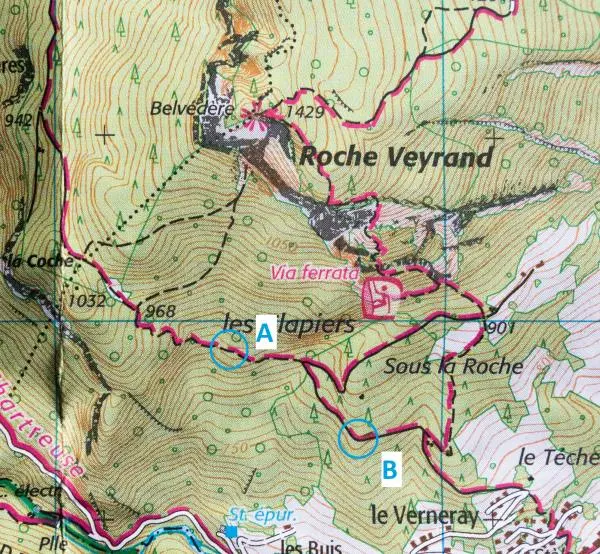
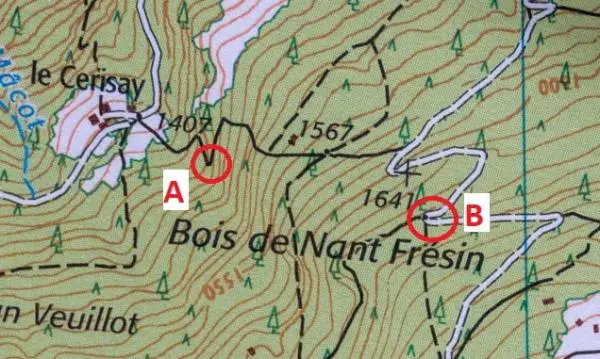
In this example, at point A you should see only broadleaved trees around you. At point B, however, there should be none.

5 – Watercourses and springs: useful for navigation, essential for refilling water

You still need to know what to expect:

  • A solid blue line = water present all year except during severe drought
  • A broken blue line = water present temporarily, depending on the time of year
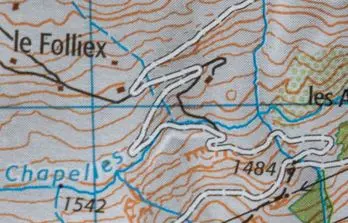
Generally, water is more likely to be present in May–June, fed by melting snow and glaciers and not yet dried up by heat. From July, “dotted” watercourses may run dry, and usually do by September.

Conditions vary from year to year with the weather, however: remember to check locally.

Reading the map and navigating on the ground


1 – The 1st principle is simple: compare what you see with what you read.

But first you need to orient the map correctly:

  • If you know exactly where you are, hold your map in your direction of travel, rather than with the labels the right way up.

This may feel counterintuitive at first, but it makes matching nearby features to those on the map easier. Turn your map regularly as you progress.

  • If you are unsure, orient the map using your compass to identify the right visual landmarks (summit, woodland edge, building). An altimeter can help if you are struggling to locate your path on the map.


2 – The 2nd principle is that you should know where you are at all times, as precisely as possible.

Here are some tips to avoid getting lost:

  • Make the effort to check your position regularly.
    Ideally, glance at your map every 5 minutes to confirm where you are. Waiting until you are unsure is already a little late, particularly in complex areas with unmarked paths, such as the route from point A to point B here (many paths and junctions in woodland).

    In complex areas, keep your finger on your position on the map
  • If you are unsure, it is better to retrace your steps to a known location than to become completely lost. Taking a “shortcut” when you are off route is tempting but risky.


A quick example using this extract:
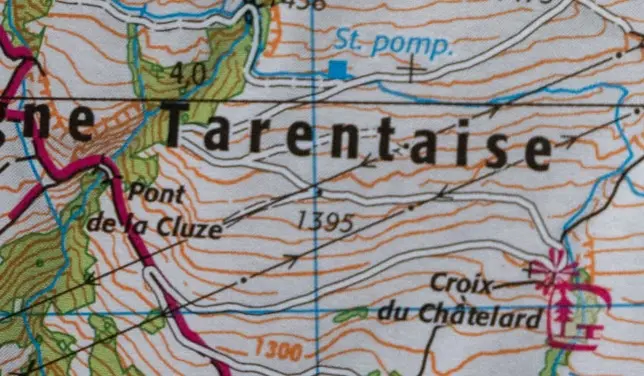
I am having a picnic at La Croix du Châtelard and want to continue towards Le Pont de la Cluze.

Here is what I can read on the map and will confirm as I progress on the ground:

  • I will take a road, not a small path.
  • The road will soon start descending.
  • I will gradually approach high-voltage power lines (black lines with dots and arrows).
  • My waymarked path resumes at a clear hairpin bend.
  • This waymarked path heads towards woodland and a bridge.
Conclusion:

Knowing how to read a map is not enough:

  • Study your route on the map before setting off to identify potential difficulties.
  • On the ground, regularly confirm your position before you even begin to doubt it.

One key word: anticipate! This discipline is the best way to hike without getting lost.

Finally, carry everything you need to find your way or contact the emergency services if you remain lost (GPS, charged mobile phone, whistle, etc.).

RayonRando wishes you wonderful hikes, on waymarked routes or otherwise!

Rain poncho or waterproof jacket?

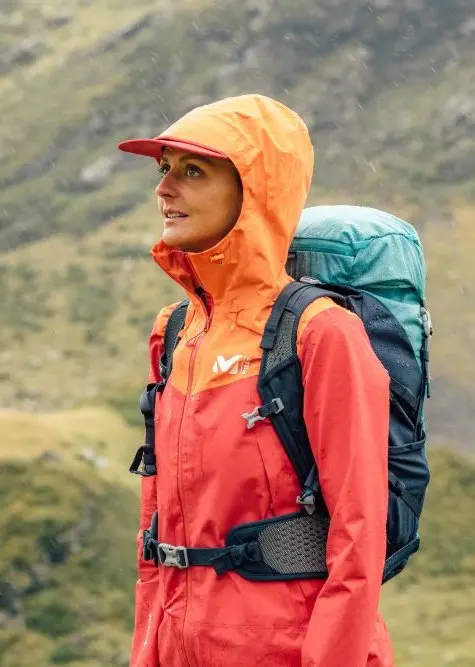
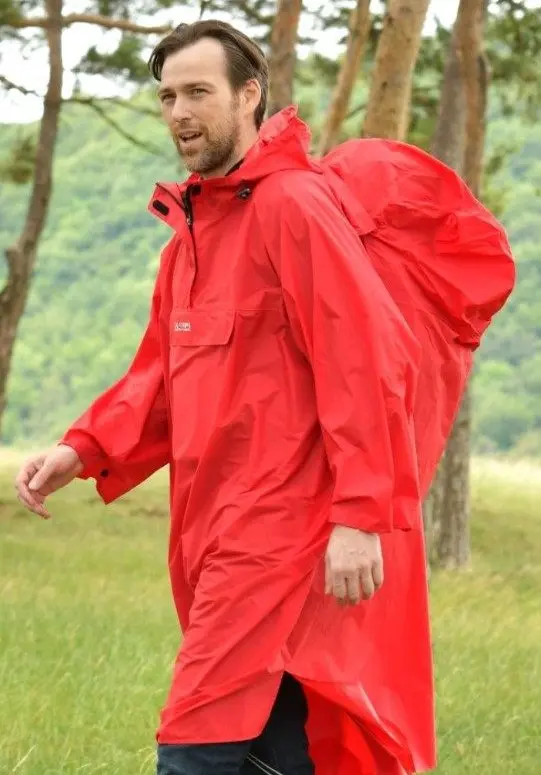
Should you choose a rain poncho or a waterproof jacket for hiking? It is a classic dilemma, with each option offering advantages in different conditions.

Our RayonRando team adapts its equipment to each outing: 

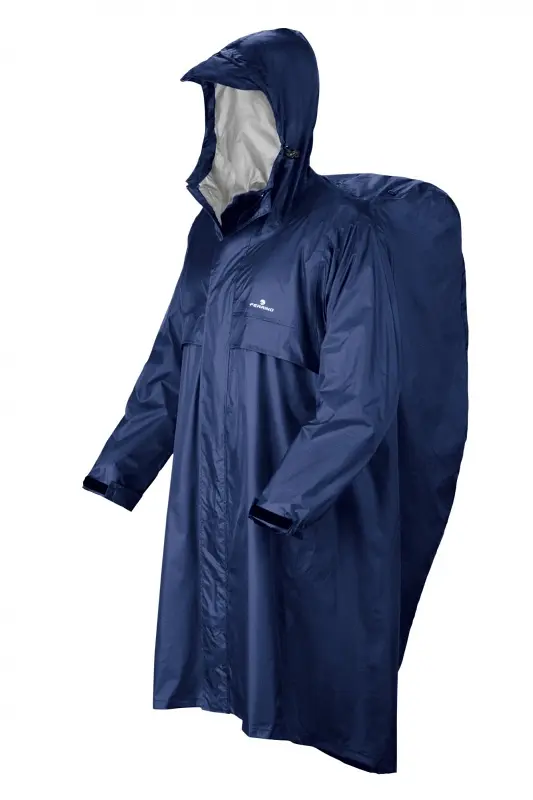
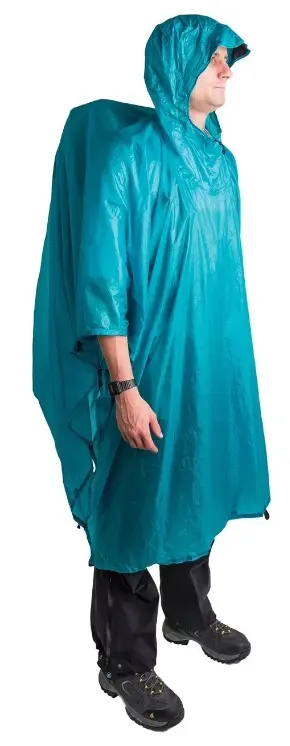
  • A rain poncho, paired with a lightweight windproof jacket to protect against wind (and cold) when it is not raining. But I do not pack waterproof trousers for hiking, because the poncho reaches below the knee, or a rucksack rain cover, since the poncho already covers the pack.
  • A waterproof jacket doubles as a windproof layer when it is dry, but always means carrying waterproof trousers and a rucksack rain cover.

As you can see, there is no single answer. The choice depends on what I am doing.

We will look at the 5 factors that favour one option or the other.

Finally, we will focus on what to wear when cycling in the rain, including accessories that help provide effective rain protection on a bike.

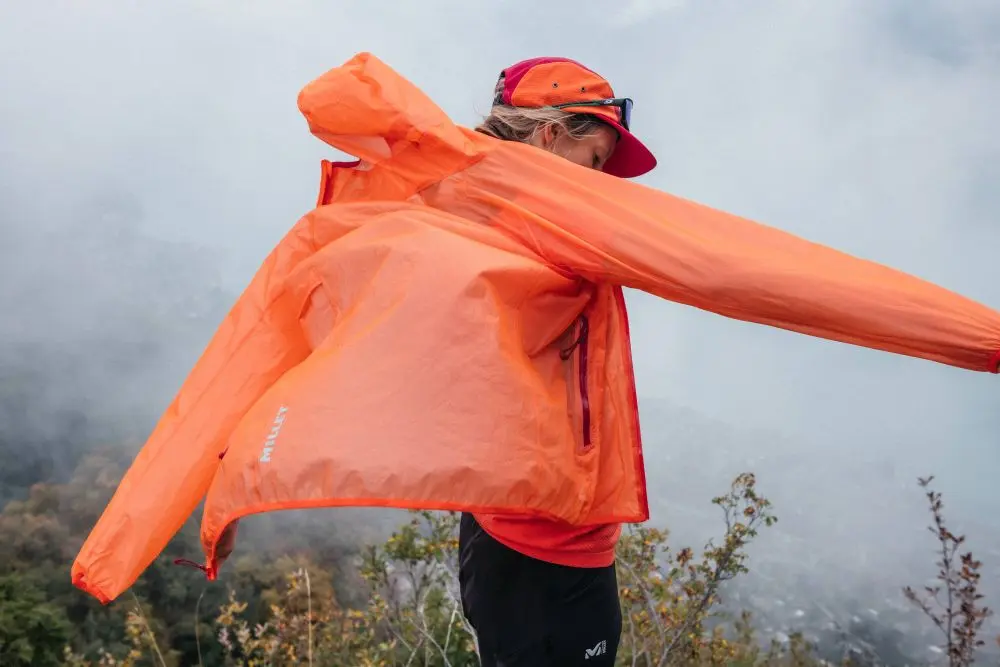
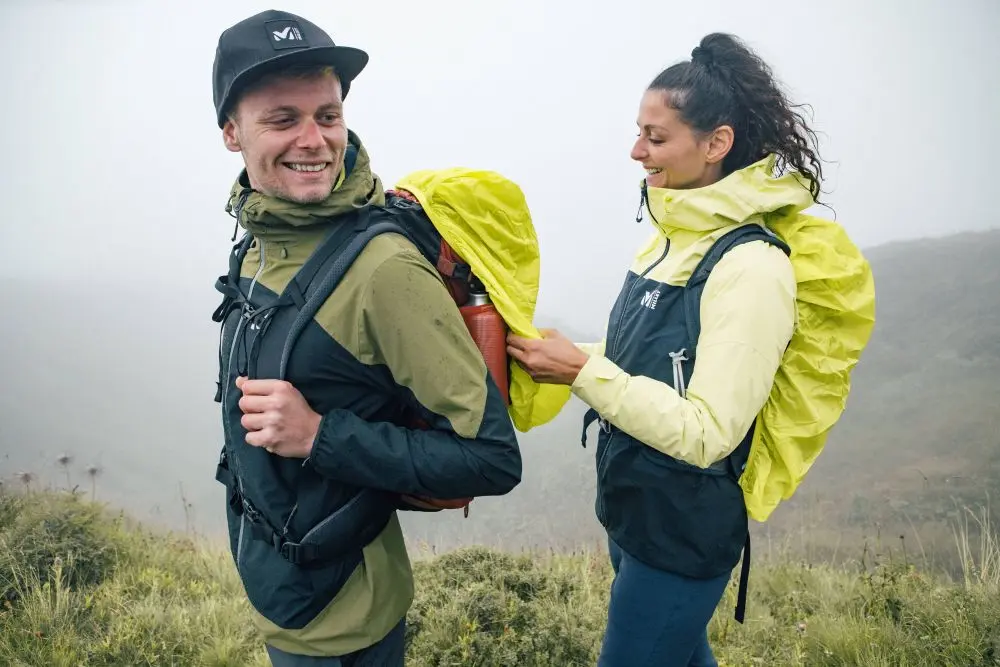
Millet waterproof jacket
Rain cover

Waterproof rain protection: real-world performance

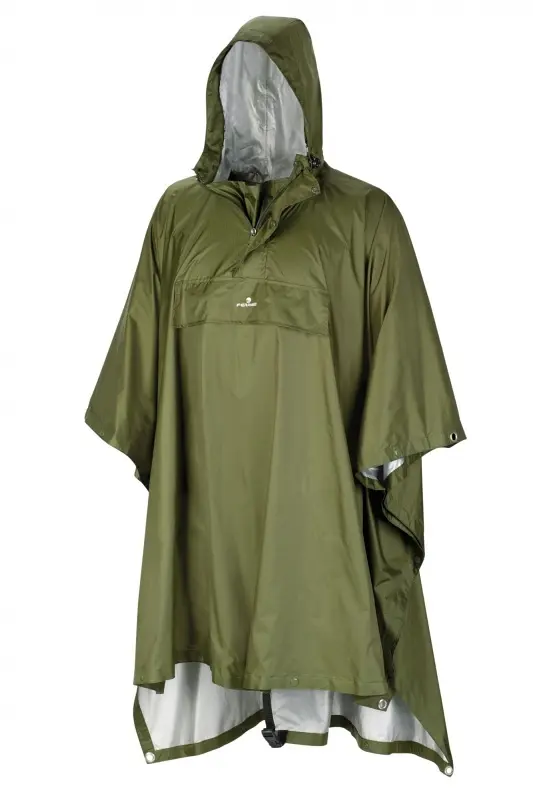
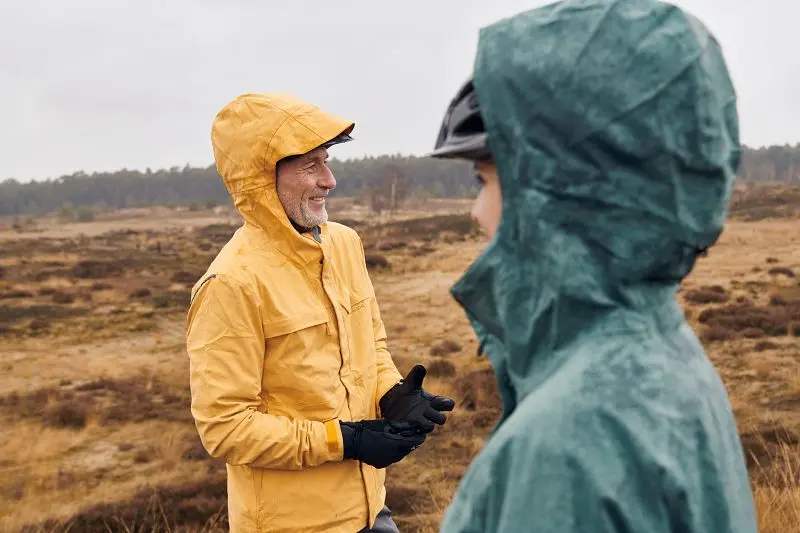
A rain poncho provides waterproof protection, keeping you dry down to your knees. Although your lower legs remain exposed, most of your body stays fully protected. The fabric is not breathable, but the loose fit provides welcome natural ventilation. 

Bear in mind, however, that a poncho with sleeves makes you sweat more, while a sleeveless poncho leaves your forearms exposed to the weather. Hiking jackets, meanwhile, often incorporate a membrane that is both waterproof and breathable.

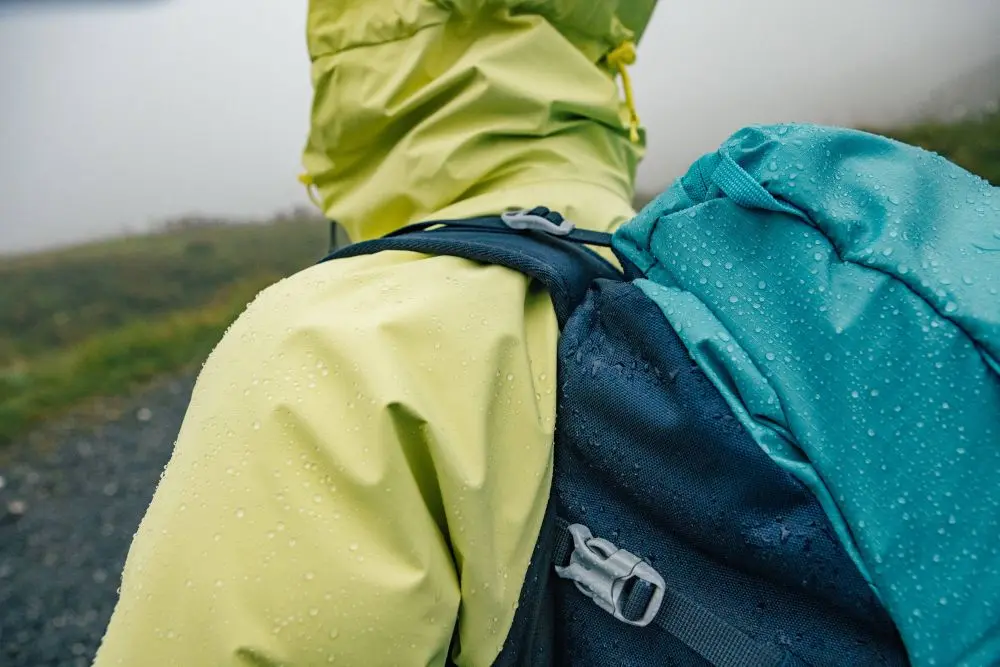
A waterproof jacket manages body moisture better and offers adjustable ventilation. However, waterproofing always has its limits, and water may enter during sufficiently prolonged exposure to heavy rain. 

This water ingress issue also affects waterproof trousers.

Protection against wind and cold: a key factor when choosing a rain poncho or waterproof jacket

In gusty conditions, the jacket + trousers combination has an advantage over a rain poncho. This detail often makes all the difference to a successful hike:

  • In driving rain and cold weather, we favour a waterproof jacket paired with trousers for optimal protection and ventilation.
  • In very windy regions such as Iceland, a hiking waterproof jacket and trousers become essential.
  • In milder weather, we find a rain poncho more practical.

Practicality: ease of use and freedom of movement

Putting on and removing waterproof clothing quickly

When it starts raining on a hike, every second counts as you put on your waterproof clothing to stay dry. 

We find a rain poncho more practical because it is just one garment to put on. It is easier with two people; on your own with a large rucksack, it takes a little practice.

If your rain poncho opens fully, there is a reliable trick for putting it over a large-capacity rucksack on your own:

  • Spread your poncho fully on the ground
  • Place your rucksack on it
  • Pick up both together and put them on your back

A waterproof jacket setup involves three separate steps for proper protection: waterproof jacket + waterproof trousers + rain cover. Trousers with full-length zips make this easier. Quarter-length zips require you to remove your footwear, wasting valuable time in the rain.

Moving freely on different hiking terrain

On technical sections (rock faces, ladders, cable-protected passages), a fitted hiking jacket provides optimal freedom of movement, even in strong winds. Its design is more ergonomic than a rain poncho.

There are two major differences:

  • A versatile waterproof jacket allows you to regulate temperature without taking it off (using ventilation zips).
  • A rain poncho is larger and less delicate, so it also serves as a groundsheet for picnics or unpacking your rucksack.

Total weight: a realistic comparison between poncho and waterproof jacket

Ultimately, the weight difference is modest:

  • Quality rain poncho + lightweight windproof jacket = 550–700 g
  • Lightweight waterproof jacket + lightweight waterproof trousers with full-length zips + rucksack rain cover = 700–750 g

If you are counting every gram, the rain poncho retains an advantage. Some ultralight ponchos weigh under 300 g (for lightweight hiking), but compromise on wind resistance and durability.

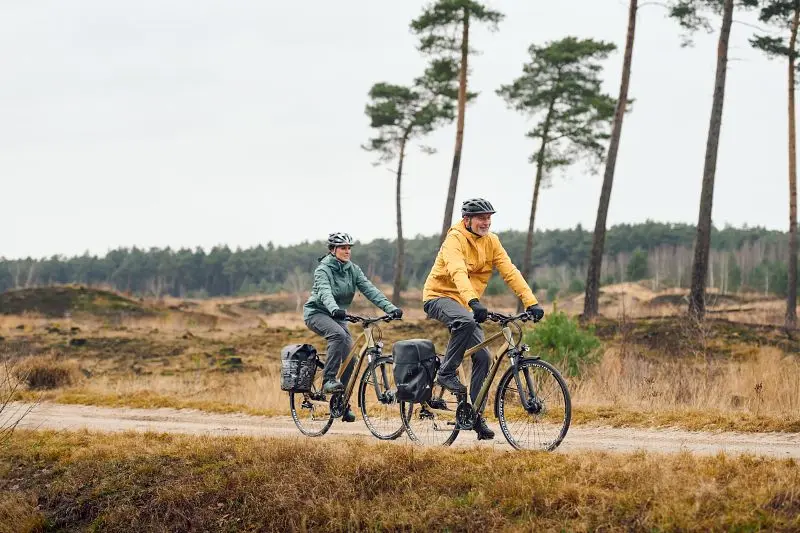
Cycling rain protection: specific challenges

Cycling in rain presents greater challenges than walking: speed, body position and exposure time create very wet and sometimes cold conditions. Here are some ways to address these challenges.

How speed affects poncho and jacket waterproofing

On a bike, rain hits fabric harder than when walking, increasing the risk of water penetration. Models such as the men's Conrad jacket and its women's equivalent, Vroni, offer excellent waterproof protection while remaining fully breathable.

From 20 km/h, wind resistance becomes a real challenge: unlike a waterproof jacket, a conventional rain poncho becomes a sail. But ponchos such as the Pro-X Bern are designed for cycling, with straps to secure them easily at various points.

Range of movement 

Pedalling requires considerable freedom of movement, so room around the legs is an important consideration.

Wearing waterproof trousers and a jacket together can feel restrictive. A poncho leaves your lower legs wet but gives you greater freedom of movement.

The seated position

When seated with your arms extended: 

  • A rain poncho forms folds between your arms, encouraging pools of water to collect that need emptying from time to time.
  • With a waterproof jacket, this seated position exposes your lower back to rain. Technical waterproof jackets such as the Escape Bike Light Jacket or Conrad protect without restricting movement, with a sufficiently long rear hem (sometimes foldable using press studs).  

Protecting hands and feet effectively

Hands are particularly exposed to wet and cold conditions and need protection without sacrificing dexterity. Waterproof gloves with a breathable membrane keep fingers warm while allowing effective brake control. Some ponchos, such as the Bern, feature waterproof mittens extending from the sleeves, designed specifically for cyclists.

Cyclists often wear low-cut footwear, leaving their feet more exposed than hikers'. For feet frequently soaked by splashes, waterproof socks or cycling-specific gaiters provide simple, effective protection against moisture.

Conclusion

At RayonRando, we choose our equipment carefully to suit real weather conditions. 

The rain poncho is our preferred option for practicality, while a complete waterproof jacket and trousers setup is essential in wind, low temperatures or on technical mountain hikes.

When cycling in the rain, we pay particular attention to protecting our hands and feet to stay completely dry. The choice between poncho and jacket depends mainly on your bike type, riding position and the expected intensity of rainfall.

Receive RayonRandoZine:

Clear, concise articles:

  • Practical advice
  • First-hand experiences
  • Technical advice
  • Route guides & destinations
  • Books on hiking and long-distance journeys...

Subscribe!

You will receive 1 free magazine a month for 12 months.

No advertising. No marketing emails.

We would like your feedback:

If you have 3 minutes, tell us what you thought of this issue. It will help us improve future issues: Share my feedback

Product comparison
Compare
Rayon Rando advice